There’s an answer to this, human-scale, no-till, regenerative agriculture. Now before you say anything crazy like, ‘we can’t produce enough food without chemicals and artificial fertilizer to support our current population…damn hippie!’ I suggest you spend some time on https://rodaleinstitute.org/ where they have 35 years of research showing organic, regenerative agriculture is more productive than ‘conventional’ (also, birth control works)… Regardless, until the steel, mouldboard plough was invented in the 1800’s, agriculture was a human-scale, no-till enterprise. For at least the 10,000 years before the plough, humans were able to grow food without a negative energy balance.
Today, we use more than 10 times the energy contained in the food we produce. That’s right, if the food on your plate holds 10 jouls of energy available to nourish your body, we consumed more than 100 joules of energy to get it there on your plate.
The energy balance doesn’t add up. Imagine if a bobcat used 10 joules of energy to catch a mouse that only gave it 1 joul of energy in nourishment…how long would that bobcat survive?
Exactly.
Thanks to fossil fuel, we’re living on borrowed time, letting the stored energy in coal/oil/gas ‘make our life easier’, but it’s not sustainable, and we have to make a change. Professional market gardeners are making a living off 1/4 acre. How much food could you grow in your yard?
…and the farmers on youtube that helped me find my way.
I tend to be a little more extreme in some areas of our farm with drastically small amounts of soil disturbance. Flipping beds by cutting out old plants to leave entire former root systems in tact for increased soil carbon and biological activity, minimal use of flame weeding if ever depending on location (weed seed eating beetles live in the top 1/4 inch of your soil!…I’ve even seen cooked earth worms as a result of a quick flame weed). Perhaps not practical on a larger scale, but works great for our 30×70 (~2000 sq foot) hoop house.
Beneficial insect attracting cover crop at the PCE.Farm in Summer, 2019. Sunflowers, buckwheat, clover, rye, and glass gem corn.
If you’re thinking about starting a small production farm, best advice I can give you is to make the time to volunteer or intern on another farm for a full year before making the jump. There are loads of small farms who need the labor, likely right in your region, and if you have the time to go big, check out how to woof ( https://wwoof.net/ ) and go anywhere. After that, consider renting land before purchasing so you can learn the value of good neighbors, how micro climates can impact your production, and avoid land where the creek is the property boarder–your neighbors can change and some are better than others…
Of almost everything I’ve done in nearly 50 years on this planet, nothing so far has given me more satisfaction than growing, cooking, and enjoying food with friends grown in my own garden. The crazy thing is, anyone can do this, and ‘back in the day’ everyone did.
You don’t need a huge farm, a greenhouse, animals, or even a tiller. Modern no-till techniques popularized in the mid-20th century by Ruth Stout’s books and now, with a more production-oriented mind set by the youtubers listed here–folks are not only feeding themselves, but making a decent living or supplementing their household income on very small plots of land.
You can literally put down a 10×10 tarp in your back yard’s sunny spot in February, pull it off 4 to six weeks later depending on your hardiness zone ( https://planthardiness.ars.usda.gov/PHZMWeb/ ), add a 4″ compost layer, plant your favorite seeds right into compost, keep it watered and Voila, you have a garden! Yes you will have weeds the first year you have to stay on top of, but repeating the tarping technique and never letting a weed stay in your garden will resolve this issue after a few years.
Do it. Grow your food. Eat less meat. Make a difference for this planet we’re stressing to the breaking point. It is that easy. You are powerful and you can change the world for the better.
These are the farmers on youtube I’ve learned the most from, many of them with concise, information packed, practical videos. Sometimes, seeing a technique demonstrated once can make all the difference.
I’ve learned so much from these guys…big thanks to you all!
Jean-Martin Fortier: http://www.themarketgardener.com/about-jm-fortier This dude is seriously inspiring… (he’s not a very active youtube guy, but reading about him, his first small 1.5 acre farm and his newer ‘ferm de quatre temps’ (four season farm) that’s 10 acres is pretty cool.
Curtis Stone ‘the urban farmer’ https://www.youtube.com/user/urbanfarmercstone This is the guy is a prolific youtuber and really shows it all, what works and what doesn’t… has great, short, practical videos on how to setup, organize, harvest, plant etc… very much geared toward making a living off of small, urban acreage with a fast paced production mindset. Though he seems to have moved away from production farming for a living, his older videos are still quite valuable.
Richard Perkins of Rigedale Permaculture: https://www.youtube.com/user/mrintegralpermanence He’s the Brit that lives in Switzerland and does a lot of poultry/egg/silvopasture (pigs/cows) as well as a growing no-dig market garden in a demanding climate…on track to pay off his farm in 5 years from farm generated income. His videos are sometimes rambling and philosophical, with some serious gems of practical ingenuity tucked in there. More of a wholistic big picture guy with loads of permaculture implementations within his animal systems and ‘key line design’ to move water through his site on a large scale increasing abundance and mediating extremes of drought/flood conditions.
Connor Crickmore of Neversink Farm: https://www.youtube.com/channel/UCp6Ia4JPJTrEJbhQ31EBRmg A former computer engineer from NYC. This dude is an efficiency master and runs his farm like a serious business. He’s invented and now sells several practical tools. Another no-tractor farm (actually all of these guys are for the most part, zero/minimal machinery farms). Another guy with short, practical, information packed videos (without the clickbait feel of Curtis Stone’s videos). Again, a professional production oriented approach to commercial farming.
Charles Dowding: https://www.youtube.com/channel/UCB1J6siDdmhwah7q0O2WJBg I love watching Charles’ videos. His approach seems to be less high-power commercial production and more happy (and beautiful) homestead farming, though he does sell quite a lot of produce from his small farm. His calming presence and relaxed tone are inspirational coming out of an operation that’s so organized, clean, and productive. Charles truly is something of a Guru in the no-dig arena.
Farmer Jessee: https://www.youtube.com/channel/UCLhu5JoRWPgEGDoUFfQHTPQ In the early days, a bit rough around the edges but another serious production farmer who has discovered the amazing power of no-till farming. He’s also got a no-till podcast that has evolved into a remarkably valuable resource, and a new book I’m reading now,
Farmer Pete: https://www.youtube.com/channel/UCDshZOSY1rAjnyJatMH9VpQ And lastly, our own little corner of the youtube space where I share the most useful ‘lightbulb moments’ tips, techniques, and philosophies employed at the PCEFarm.
All of them are ‘feet on the ground’ farmers and with the exception of Fortier and Stone, have already or seem to be moving toward no till/no dig, intensive farming.
If you’re not familiar with the Rodale Institute (rodaleinstitute.org), they are a great resource with decades of science backing up no-till, organic practice as more productive than conventional agriculture…now this:
This year we’ve returned to semi-production as we learn what does well, and how to grow things in the new hoop house.
Basil, Mizuna, Tomatoes, and Soybeans are a few of the things we’re trying out in the hoop house this year.
Some things are doing amazingly well. The first bed of Kale that was seeded in early February is still going strong, and tasting great even now on the edge of July. Mizuna, Arugula, and Spinach (in that order) decided it was too hot and started to set seed, although a second sewing of Mizuna has done remarkably well in spite of some flea beetle damage and the heat. Another trial sewing of Spinach (blooms dale long standing) is in progress to see if we can keep it from going to seed immediately as the outdoor planting did. I’m totally excited about seeing how the ‘lower and lean’ tomato trellis technique goes for our indeterminate varieties, as well as figuring out the optimal pruning method for the determinates.
For fertility, we’re exclusively top dressing the beds with finished compost (1/6 biochar, 1/3 spent brewery grain the rest horse manure with a few wood chips thrown in for good measure). Following Charles Dowding’s no-till advice, I’m not adding concentrated amendments, just allowing the critters to do the work as they process the fresh compost and work it into the soil.
I’ve had some spotty germination challenges, which I believe are a mixture of poor seeding (the Jang seeder is going to be my yule tide gift this year) and inadequate watering during the first critical time of germination, otherwise, No complaints what-so-ever.
Having a focused area to maintain and care for outside of the greater farm has made me realize that attempting to do too much has been a huge challenge for me. Smaller, but better maintained land area is far more pleasurable, and so far productive, than a large area you can’t keep up with. As a result, there’s a lot of flowering cover crop at the farm right now, and the bees are just fine with this change in management strategy!
One delightful win for adding diversity rather than eliminating it, we seemingly have Basil downy mildew fully under control using Joseph Salvatori of the Garden Tea Company’s (http://www.gardenteacompany.com/ ) advice of letting a pint of milk sit open for 24 hours with a table spoon of yoghurt in it, then diluting 1:1 with filtered/spring/well water and spraying on the underside and top of the leaves. No fungicides to kill anything, just more good bacteria and nutrients to protect against pathogens. And it works incredibly well.
PS: If you have groundhogs and wonder if you should ‘do something’ to protect your hoop house…wonder no longer.
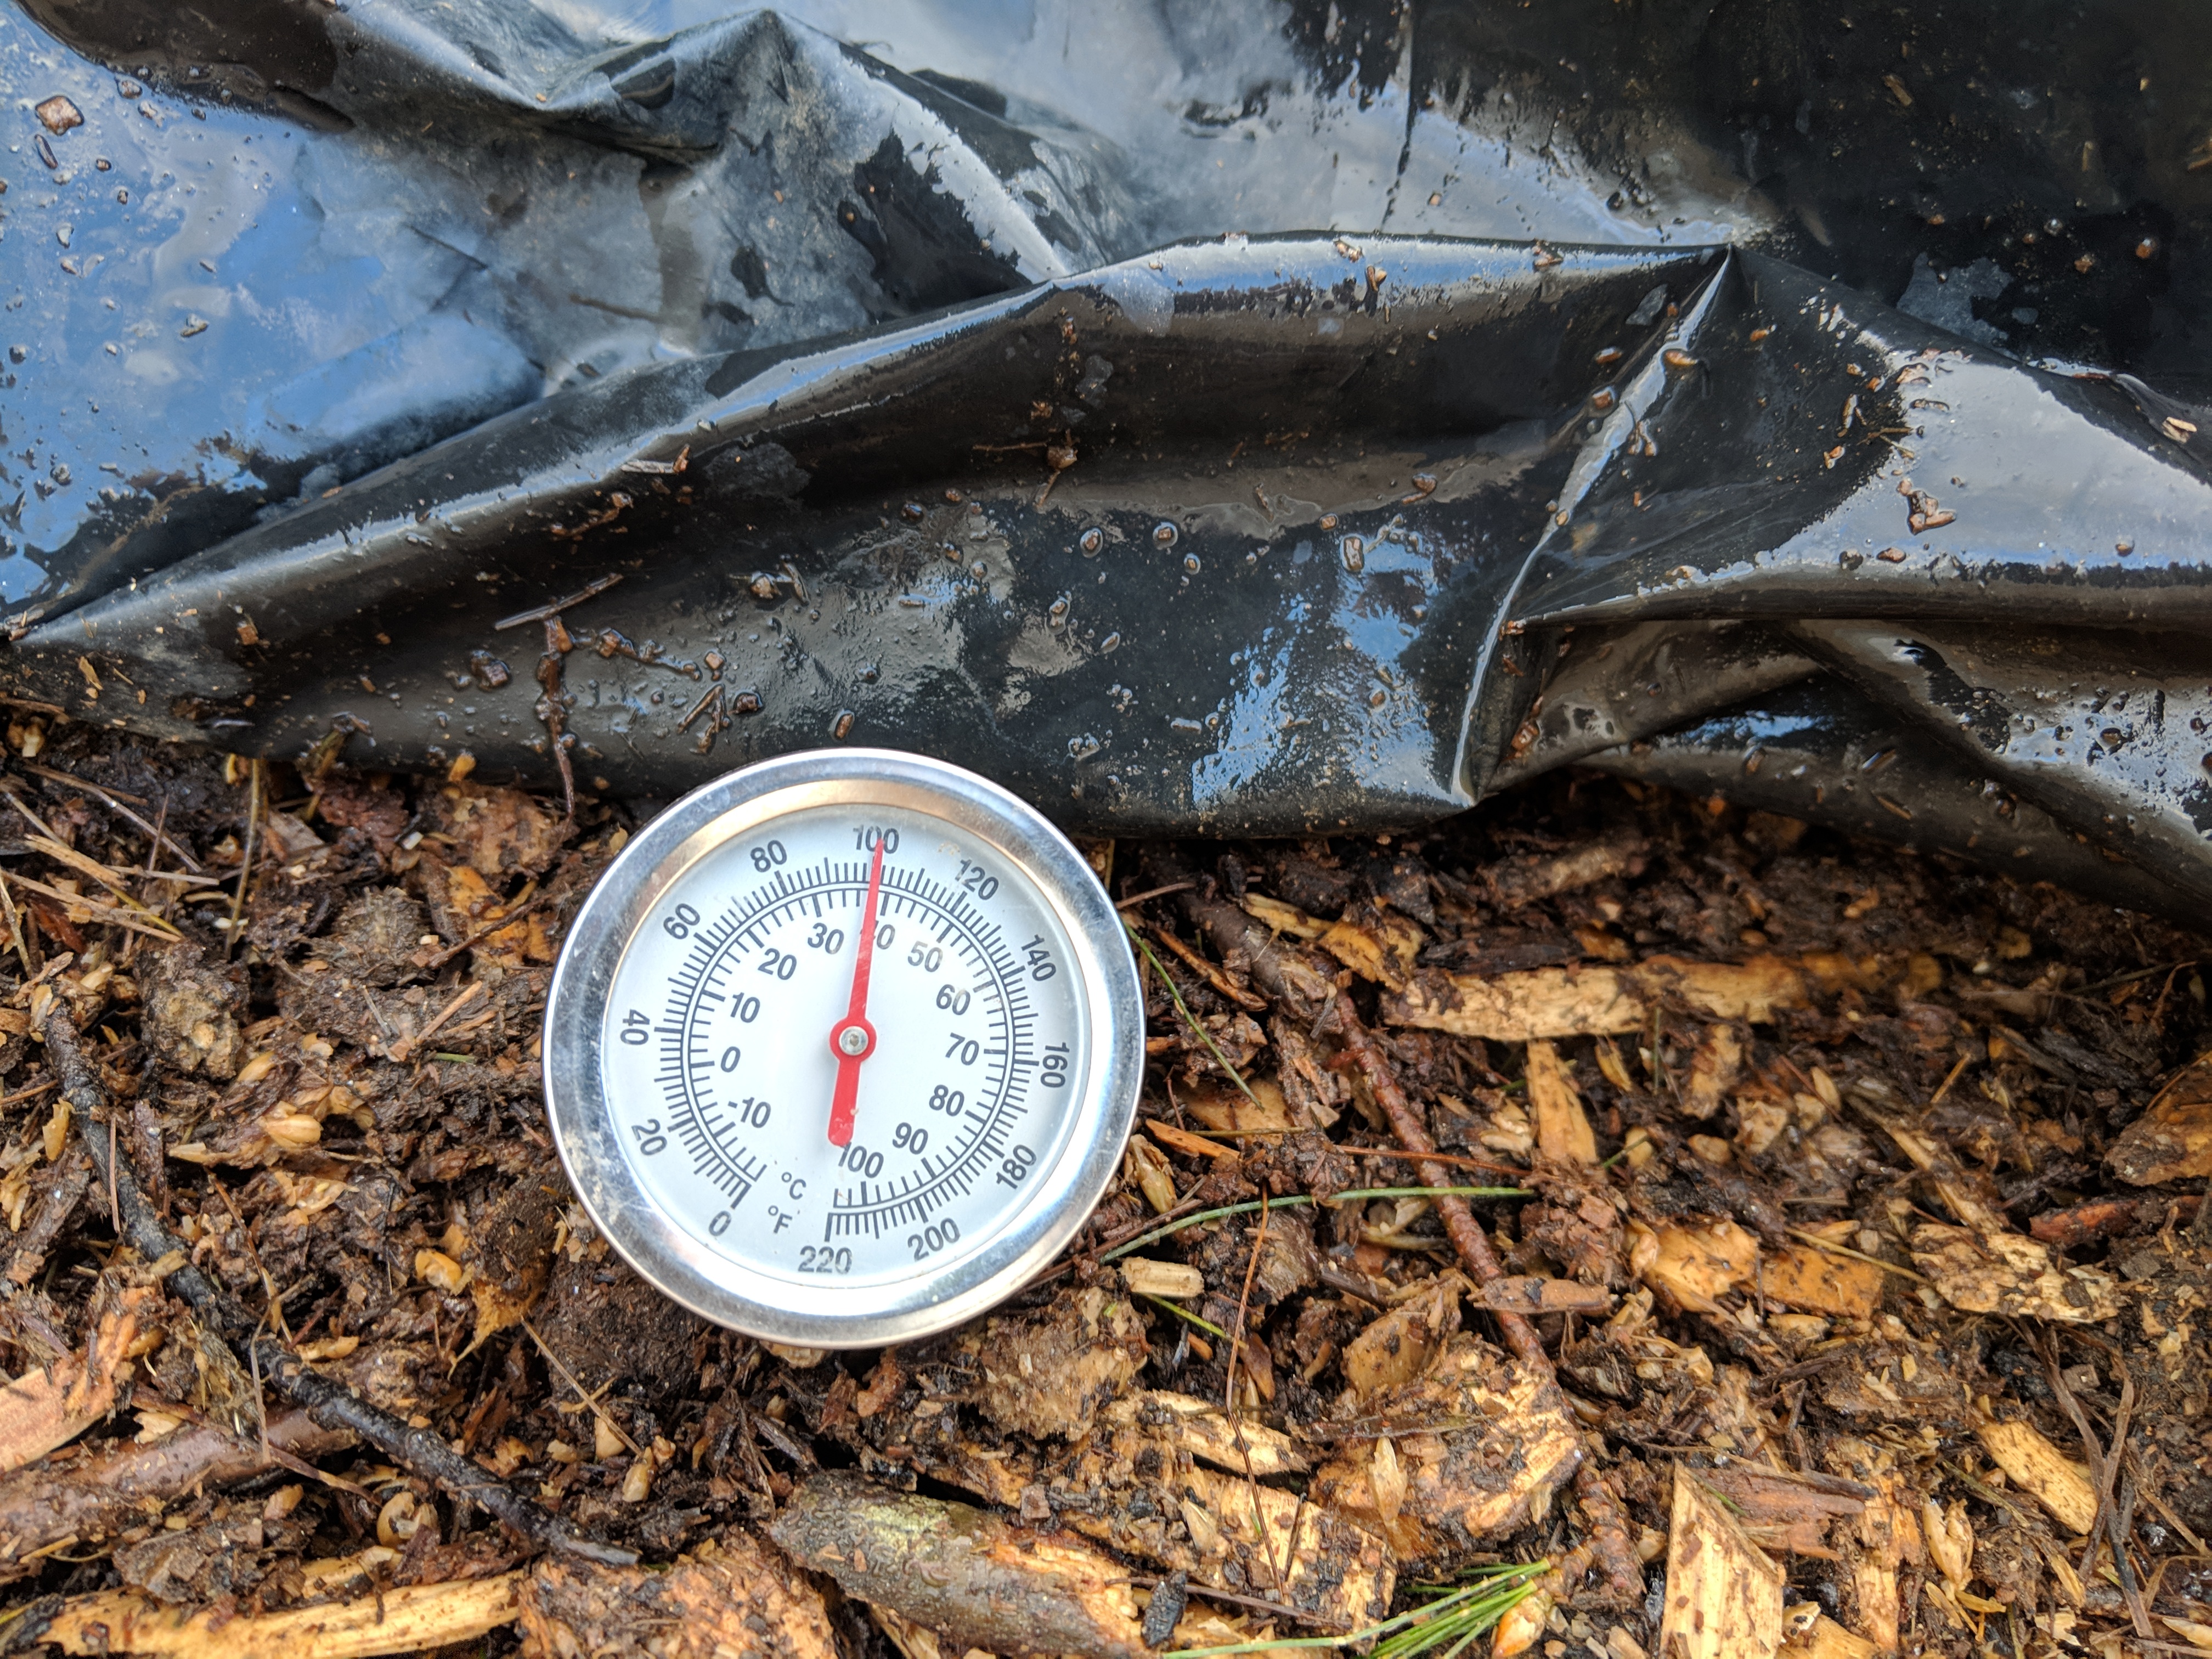
Thought the setup took a bit of doing, surprisingly little when you consider the results–we’re now looking at 3 to 6 months of almost free heat for a 200 square foot room in the barn.
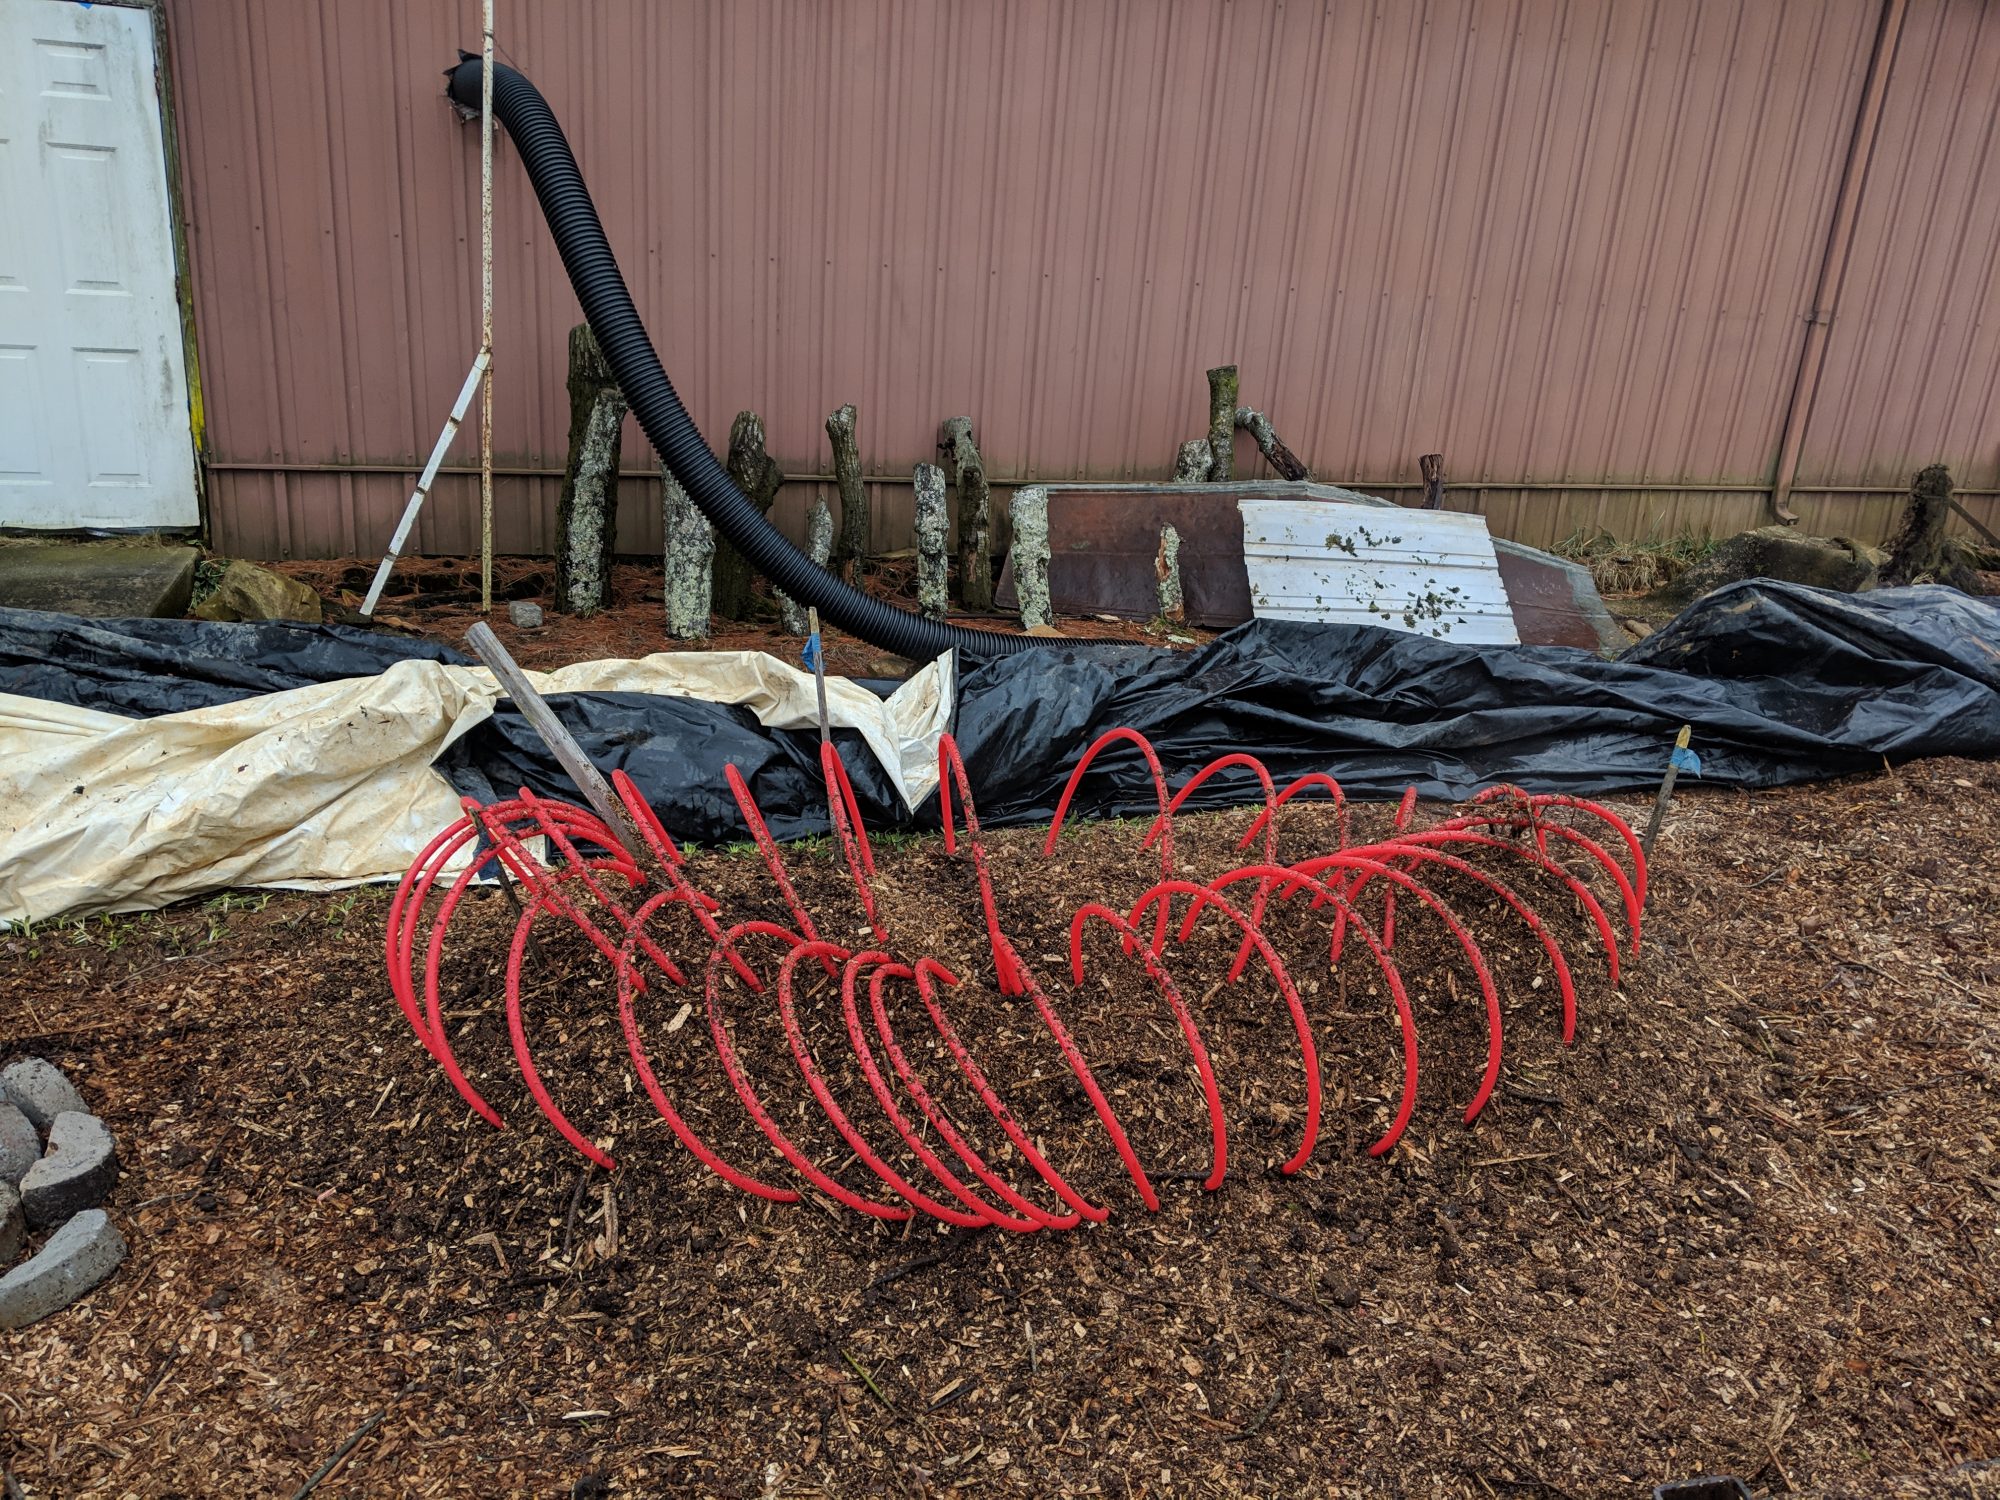
The pile took 2 hours to build (shifted by hand out of the back of a trailer), and the materials for the heat transfer coils (300 feet of 3/4″ pex pipe, fittings, clamps and pump and fans) cost under $400.00. The plumbing work took about 2 hours as well. See the previous post about Jean Pain for more info and links to resources.
The system can keep the room at 70F when it’s 17F outside, with heat from a 6 ton compost pile.
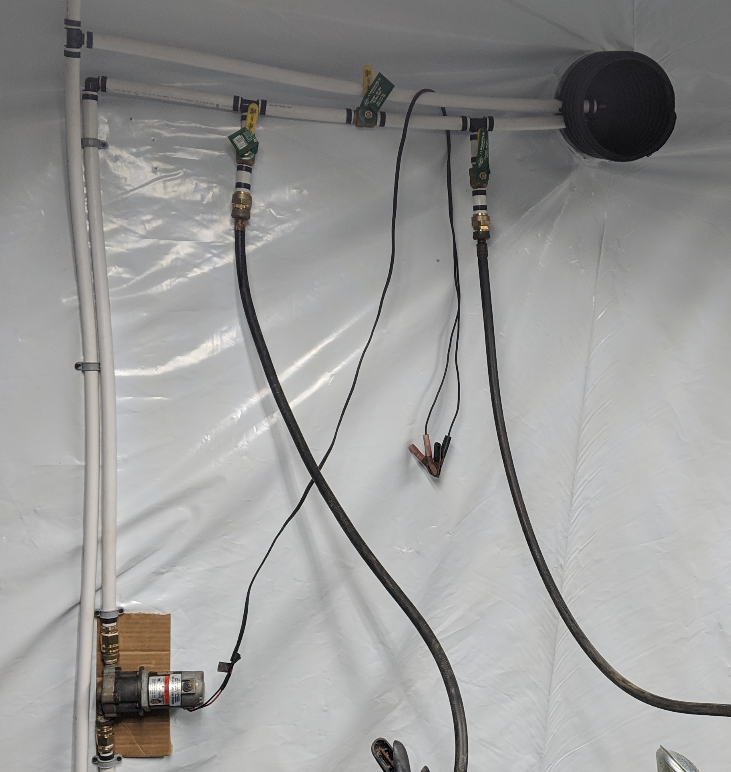
Here’s the layout of the valves and inlets to the loop which make it easy to get all the air out. Just hook up a relatively powerful circulation pump and use a 5 gallon bucket for the water to circulate through, eliminating all air bubbles, when filling. I like to put the circulation pump so that any air that might get trapped in it can escape when the pump is off. The highest point in this system is an expansion tank above the ‘T’ fitting seen in the upper left hand corner of the image below.