If you thought the ‘haplo-diploidy’ video’s I’ve posted links to here previously didn’t give enough of an indication about just how complex Honey Bee genetics are, this article of some new research in Australia will give you something more to think about!
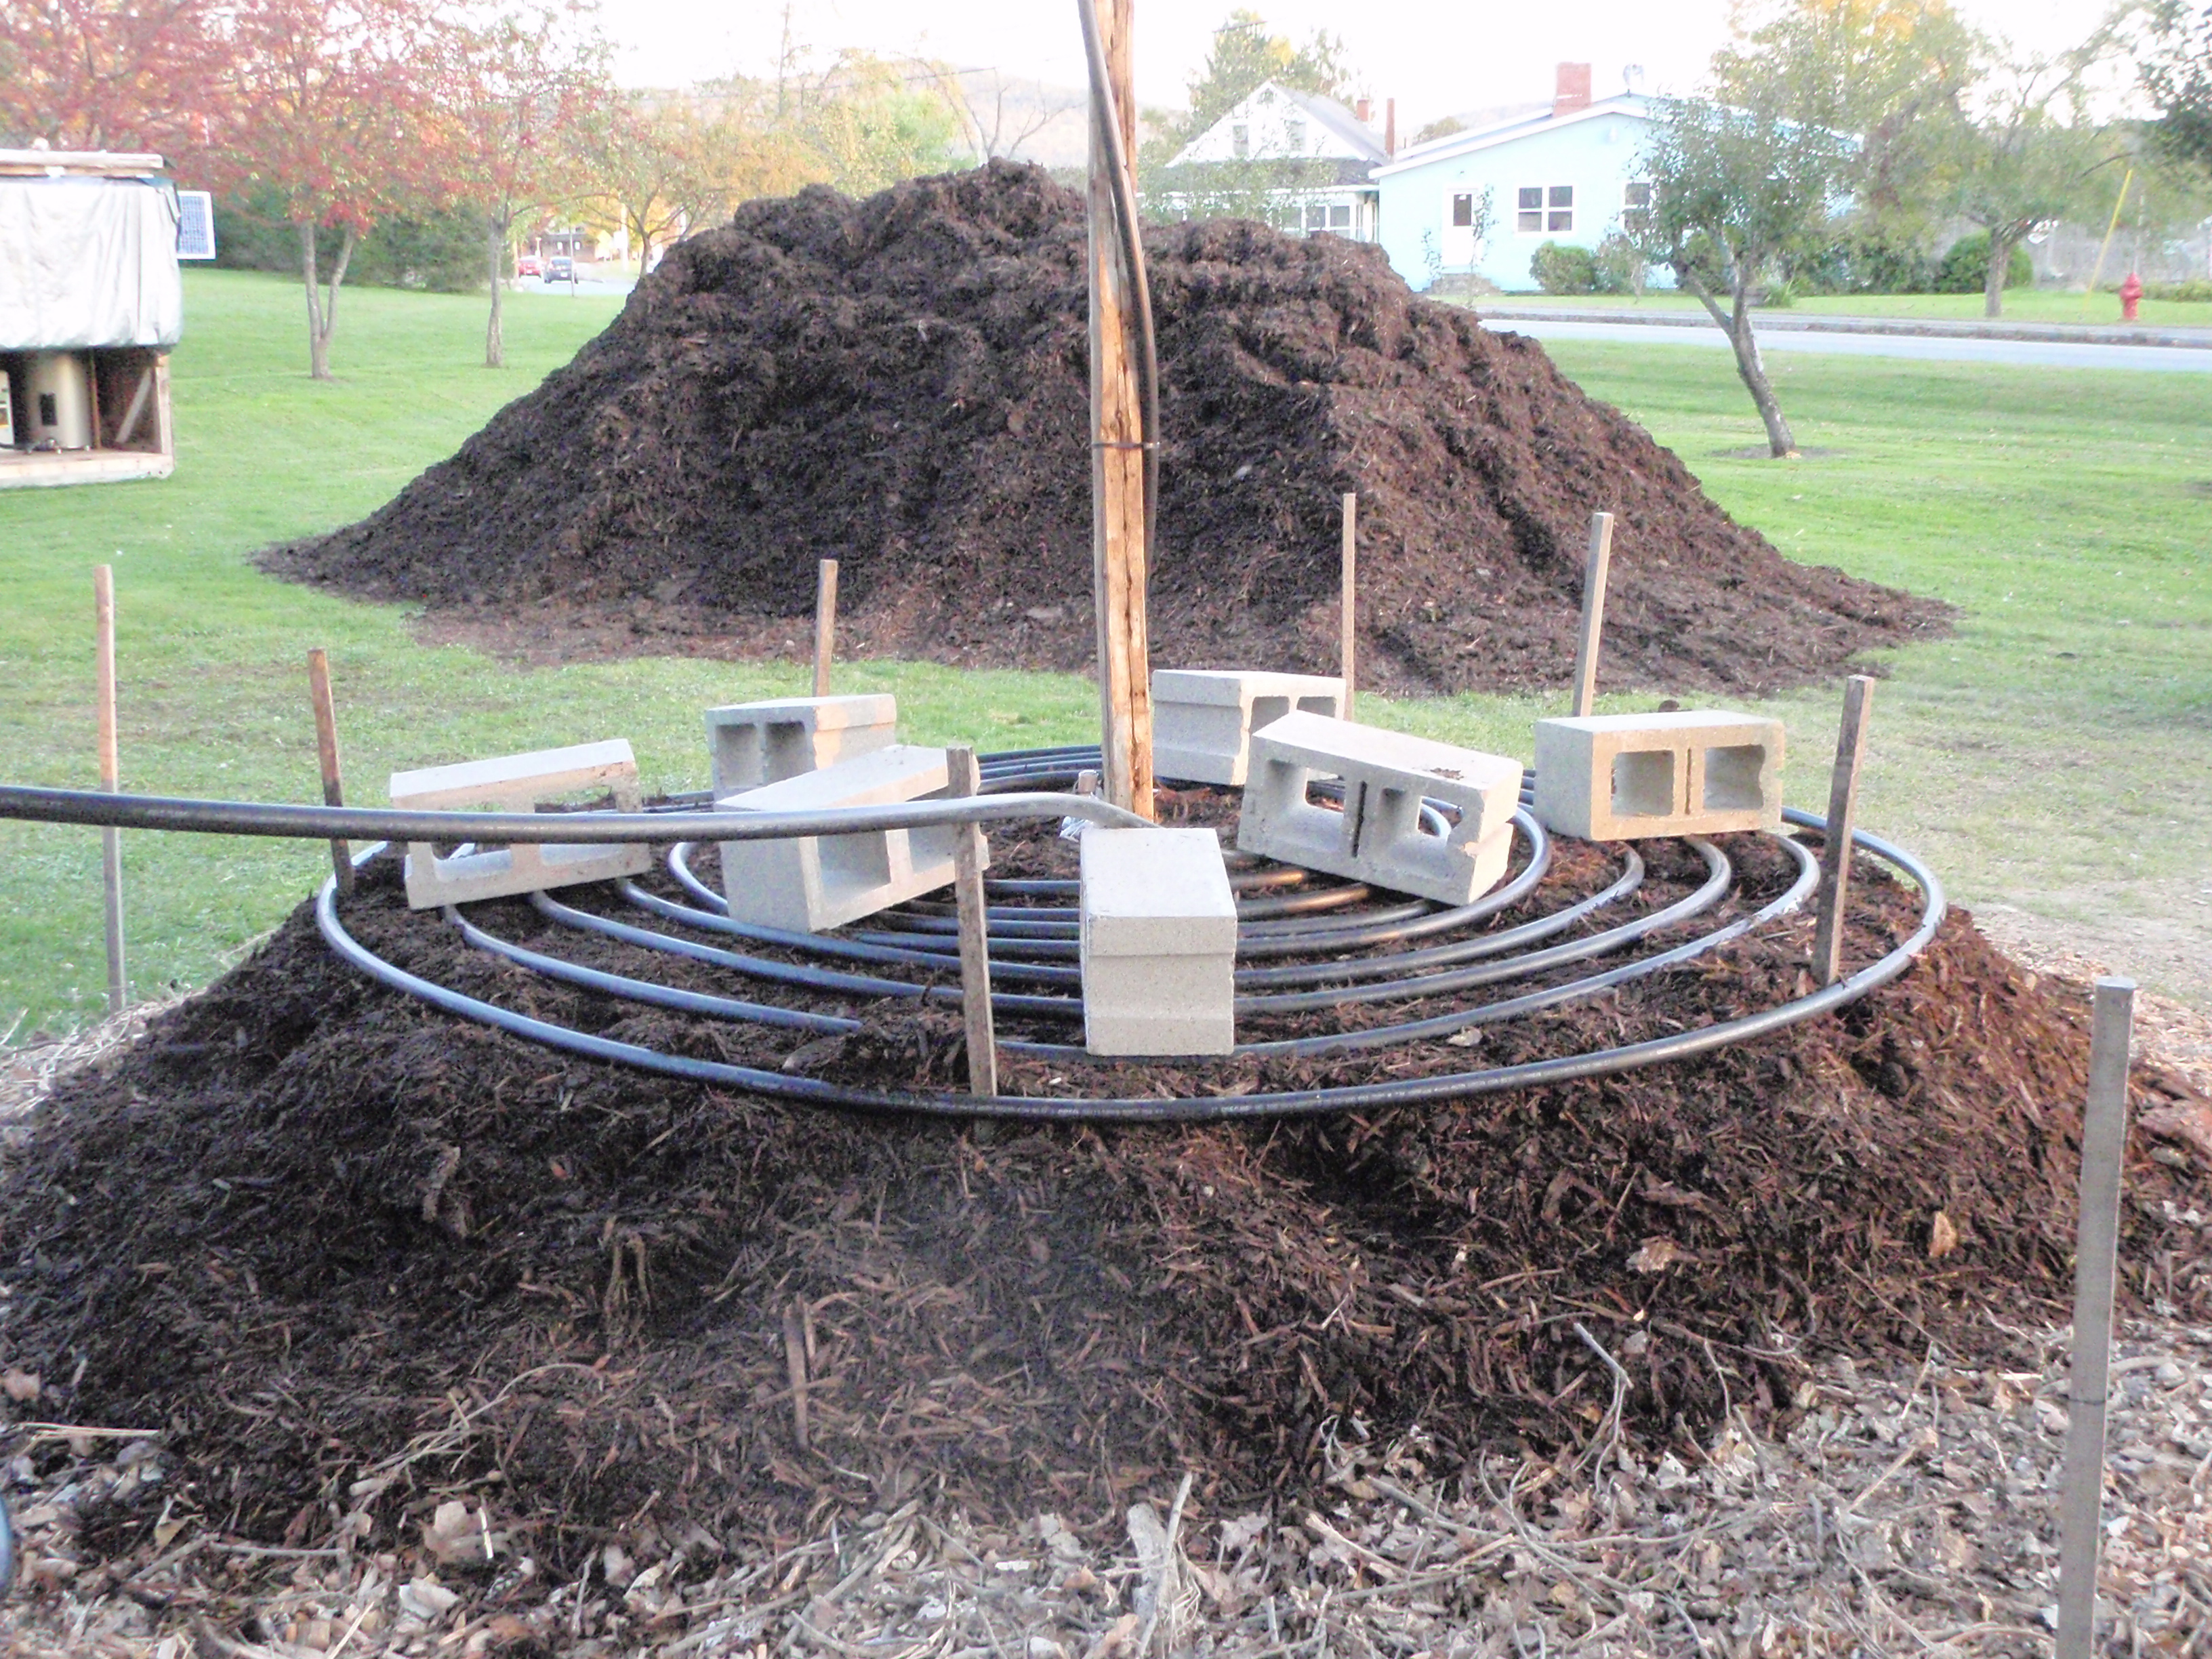
We’re just about to implement some compost-powered root-zone heat systems for a small, indoor plant nursery and the new high tunnel. These are the best references I came up with on researching the implementation of compost powered root-zone heating systems for greenhouses or other closed growing environments.
Hope you find them helpful!
pb
Cornell Small Farm’s energy research compost pile.
We’ve started producing biochar at the farm, primarily for our own use, but if you twist my arm hard enough I’ll sell some as well. You can see our ‘how to’ video produced in October 2020 here: https://www.youtube.com/watch?v=gBx5ngn9Dpk
I wanted an easy place to refer back to when I forget the recommended ratio to mix with compost for a good biological/mineral/nutrient pre-charge and subsequent application rates. So here it is!
Biochar Application rates:
Remember that raw biochar will absorb minerals and nutrients in your soil for the first couple of years, nature will correct, so not a big deal but if you want to give your soil and immediate boost, pre-charge your biochar before application
Easiest way to get it ready for direct application is to mix in when building compost piles
Mix up to 1:1 or 50% by volume with finished compost and let rest for a couple of weeks before application
Or up to 1:3 or 33% biochar by volume in unfinished compost for good mineral/nutrient/biological pre-charge of the char before application (higher biochar ratios may shut down your pile)
Apply pre-charged biochar directly to root zone or in seed furrows at a rate of 1% to 10% biochar by volume of amendments applied.
If applying bulk, pure biochar directly, go for 1000 to 2000 lbs biochar/acre (raw or pre-charged)
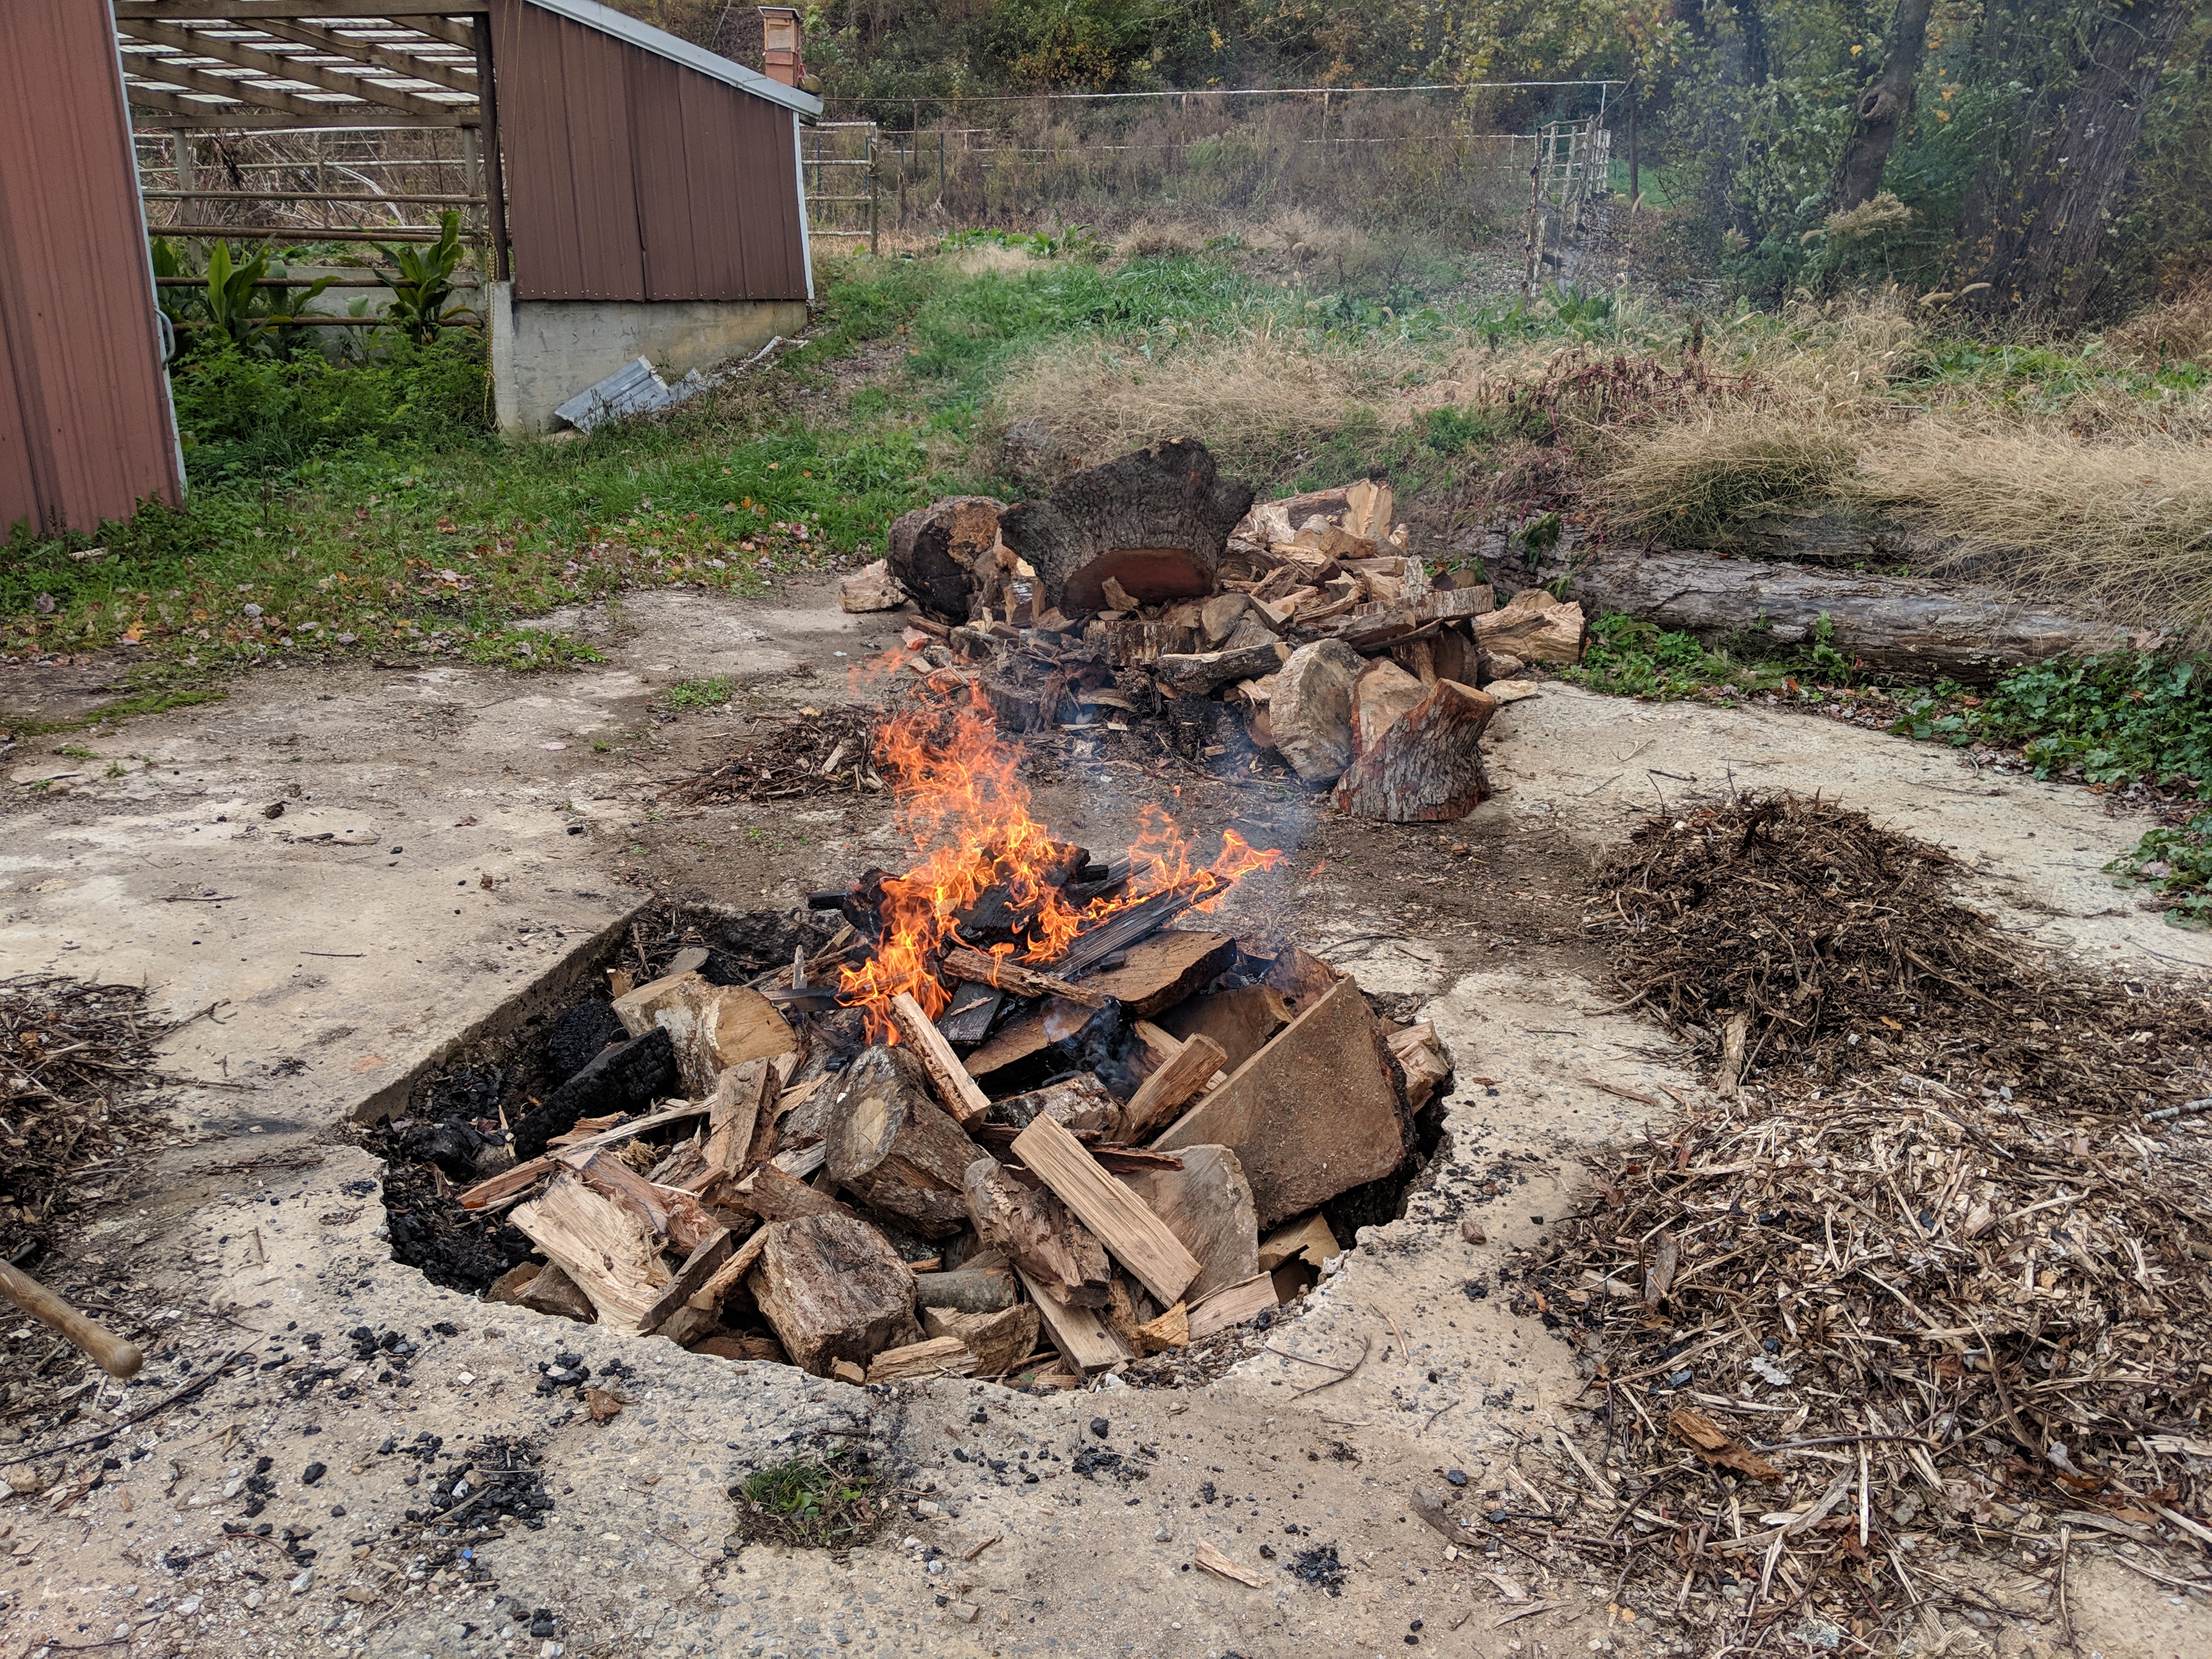
The key to a highly productive, low tech/low cost biochar pit burn:
Start your fire in the bottom of the empty pit
slowly add material until the fire just starts to smoke
let the fire build back up and compact the pile/add more material before any white ash is apparent on any surface
frequently compacting the burn pile with a heavy poker, crushing coals off and tightening raw wood, really helps final yield
take care to fill in gaps which might burn too quickly
if you don’t watch your fire, your char will burn up
THOROUGHLY quench the fire with water, removing any unburned wood where live coals might be smoldering, and stir the coals until no more steam or smoke is produced
Let the char cool/drain overnight and dig out into your compost piles.
Low tech, low cost biochar pits can produce good char even from less than ideal wood sources if tended properly.
For our biochar pit (6′ diameter, 4′ deep) it takes about 8 hours to char 6 cubic yards of bulky less than ideal wood. A well tended burn will yield around 250 gallons of char.
Another great, simple way to make char at lower quantities is to use a 50 gallon barrel with no holes and an open top set at a 45 to 60 degree angle. Just build a small fire in the bottom and slowly feed it until it smokes then wait until it starts to ash. Repeat until full, tip it upright and quench with water. Here’s a video of that method: https://www.youtube.com/watch?v=bNOiVCpRWXw
Best references I’ve come across to develop this process:
A hard core scienc article on biochar made from rice hulls
Though we haven’t done it yet, I’ve recently (February 2022) learned from Dr. Olivier Husson’s interview on the regenerative agriculture podcast (http://regenerativeagriculturepodcast.com/redox-the-driver-of-soil-microbial-interactions-and-nutrient-availability-with-olivier-husson) that paramagnetic biochar can be produced by soaking your source material in a saturated iron sulfate solution for 24 hours before pyrolysis. I’m looking forward to trying this technique at our farm. Note: this can produce a very acidic biochar (pH around 2.5 at 400 °C, around 6 at 700°C…from direct corespondence with Dr. Husson), so how you inoculate your biochar after production may need to be adjusted accordingly.
I get asked this question a lot, and perhaps somewhat surprisingly, the answer isn’t ‘ become a bee keeper’ (there’s a lot of evidence that feral bees are doing just ok, often better than kept honey bees), and our transport of bees/honey/pollen around the world in the age of globalization has done a great job of transporting parasites, viruses, and other maladies, which have now started crossing to other species.
So you want to ‘save the bees’, then start thinking about all insects, and our use of toxins in the food system. Here’s recent reply to a visitor of our website which sums things up as succinctly as I can:
———- Forwarded message ———
From: Peter Brezny<peter@psychochickenecofarm.com>
Date: Thu, Oct 11, 2018 at 4:17 PM
Subject: Re: Interest in becoming a Bee Guardian
To: <redacted for privacy>
Jane,
Thanks for the note and your interest in protecting pollinators on our planet.
Sounds like you’re heavy into food systems and education. Well done!
As I hope became clear from your reading on our website, honey bees are the economic indicator we follow that helps us understand just how much peril all insects are in at the present time. Only 2% of insects on the planet are harmful to crops, and many of the other 98% are ‘pest’ insect predators!. All of them are in drastic decline and pesticides (duh)/climate change are the problem.
The very best thing you can do to protect pollinators is not to become a beekeeper, but to work to create pollinator habitat, and advocate for pesticide free zones and organic farming/chemical free farming techniques. Everyone with a yard has the chance to create a safe habitat for pollinators.
There are a lot of excellent resources directly related to this:
WNC experienced pretty significant honey bee colony losses over the past winter. The Buncombe County club reports an average of 70% loss. Our bees were wiped out as well, so this year, I’ve teamed up with friends Joseph and Erik, to raise queens from local, treatment free survivor stock.
For a better understanding of why local, treatment free, bees with good genetics is so important, check out:
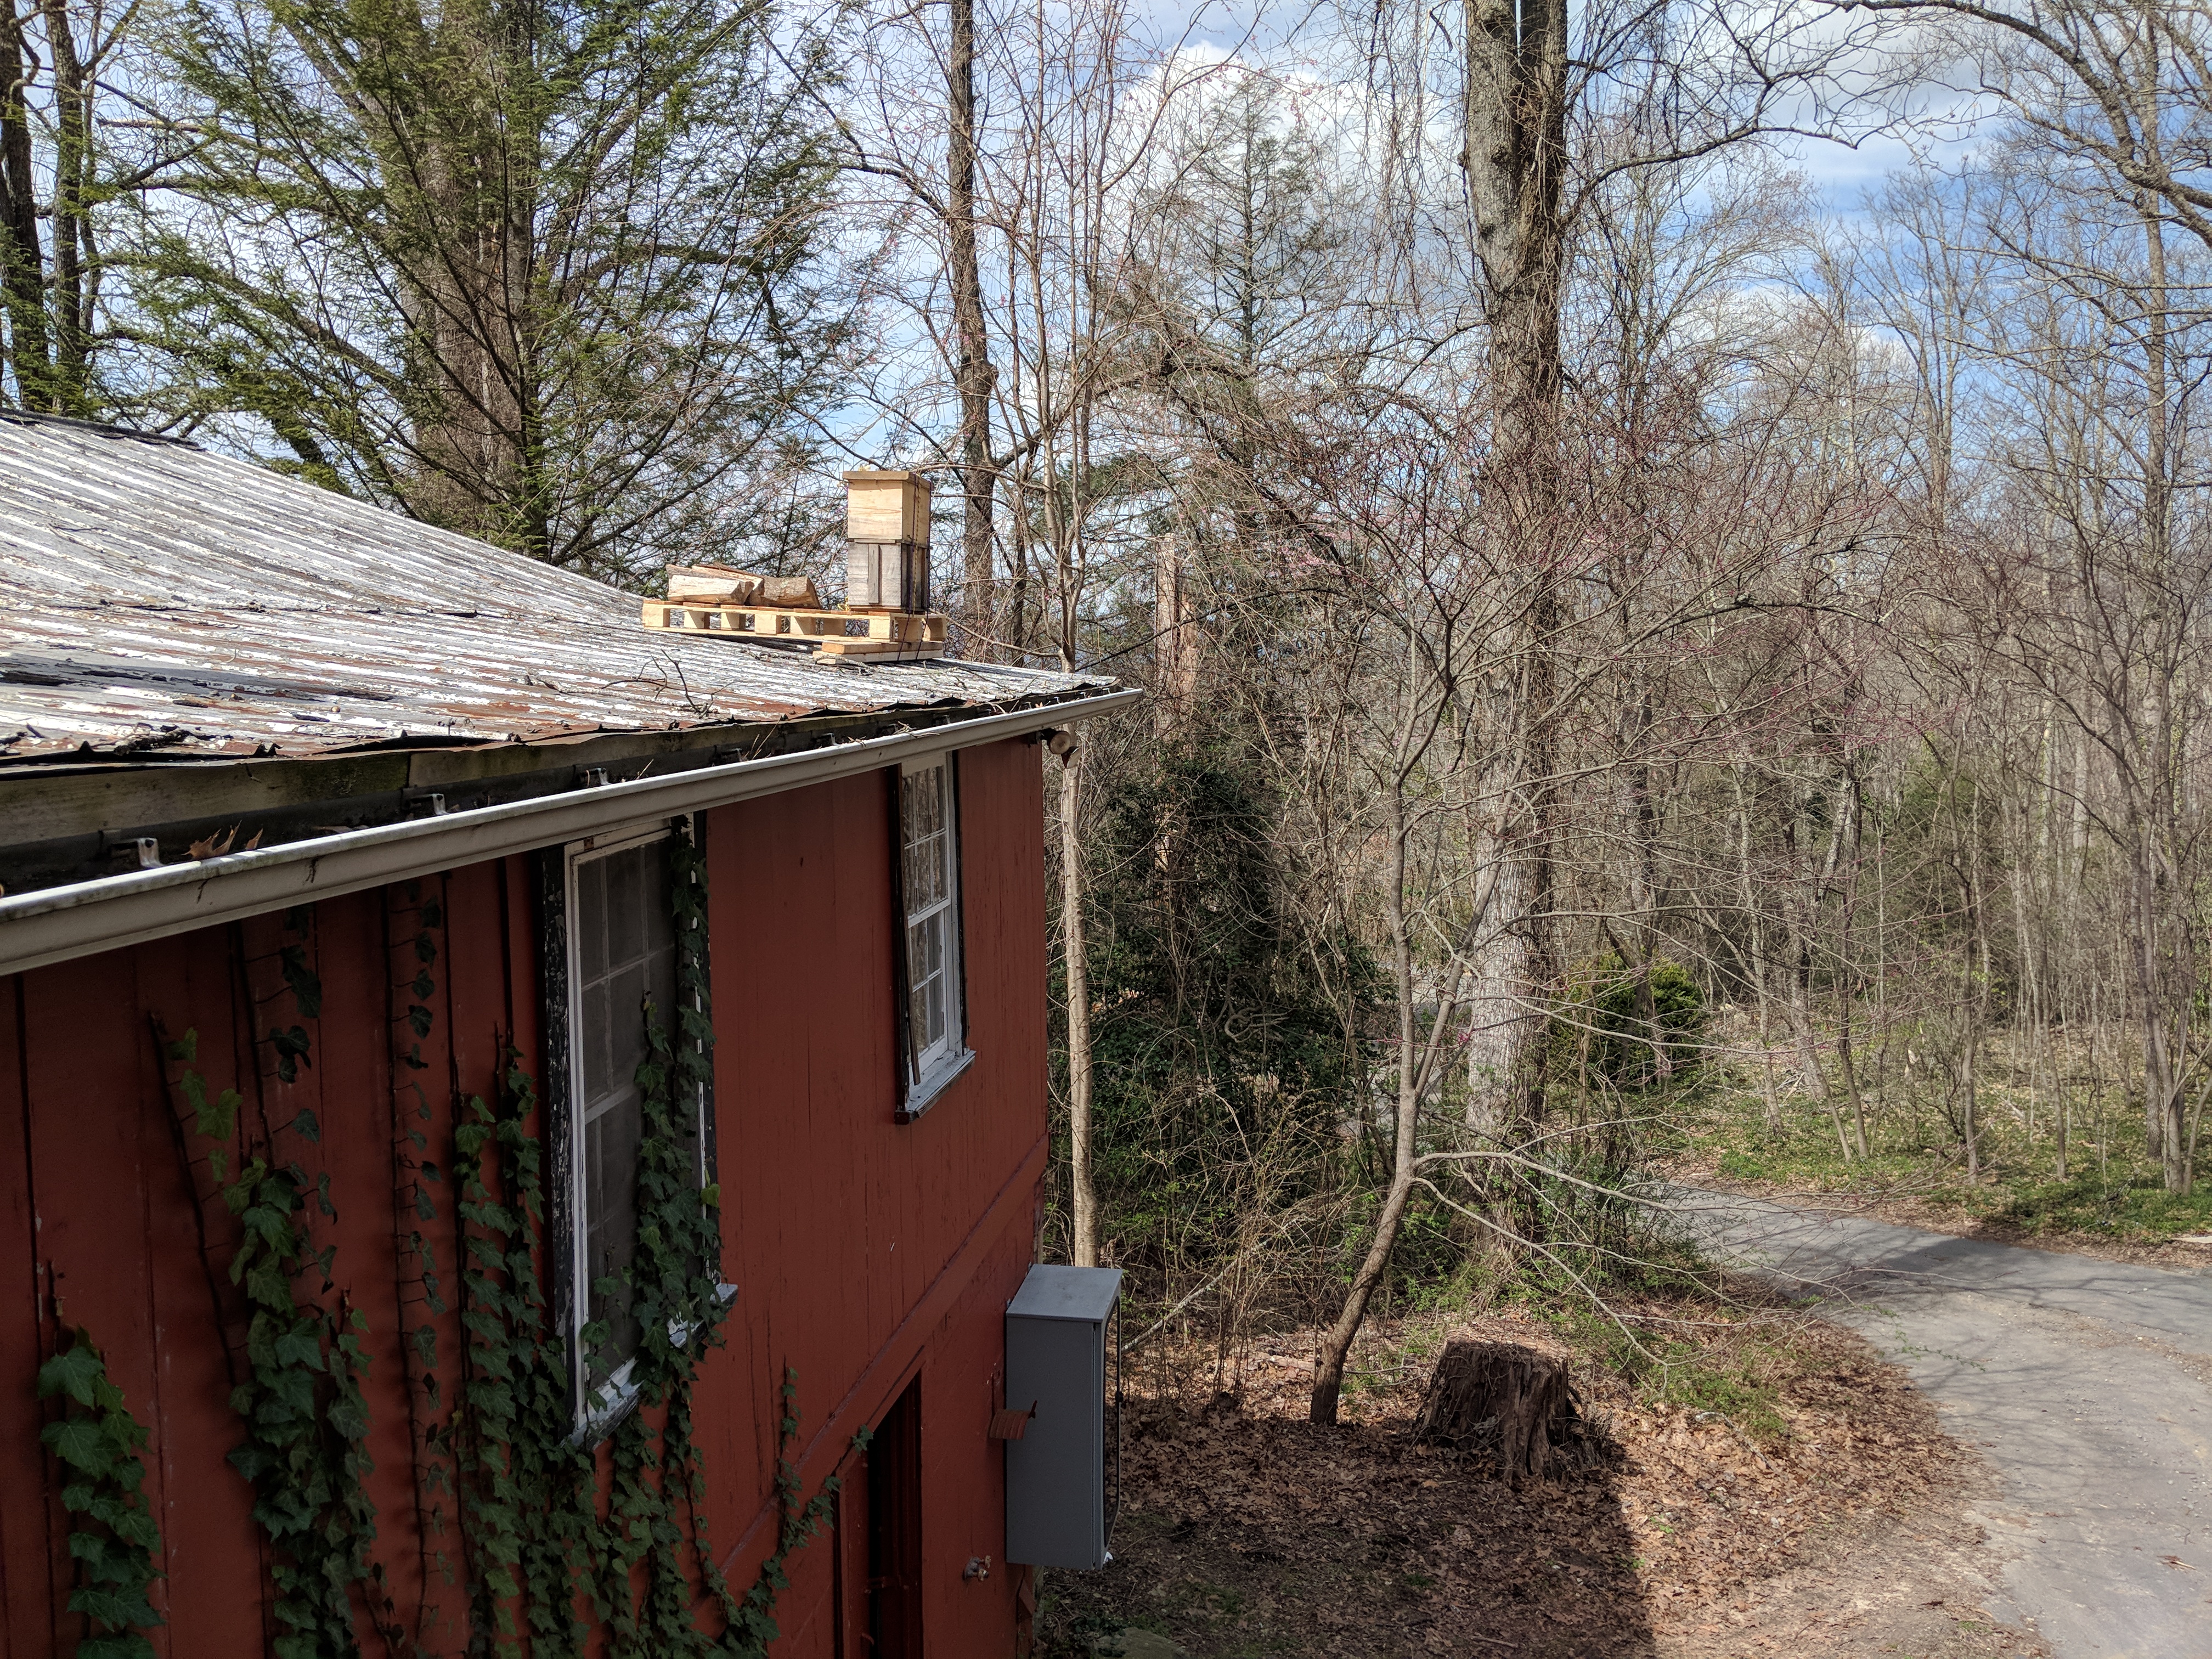
Bees are expensive to buy, so this year (in addition to buying some bees, as locally sourced as possible) I’ve put up bait hives in multiple places with the hopes that I might be lucky enough to attract a feral swarm. If they find the bait hive an acceptable place to start a new home, they’ll move in and start building comb for the queen to lay in. Here’s an image of one on a roof in East Buncombe County.
Our first run of grafted queen cells (where you remove young larvae and place them into special cups for bees to rear as queens) weren’t accepted by the cell builder colony. They chose to raise their own queens instead, so we simply moved the frames with queen cells on them into mating nucs.
For our second round (grafted today) the cell builder now has no other appropriate aged eggs to use for raising queens so we’re hoping to have the easier to transport/share queen cell’s that we grafted ‘take’ and be ready in about 12 days.
Here’s a gallery of our queen rearing efforts so far this year: